Saturday, December 10, 2011

"Hot chocolate warms you up"


If you follow me on Twitter or heard me mention it in a past video, you already know about Hayden's favorite phrase at the moment: "Hot chocolate warms you up. Try some?"

She's been saying this all the time lately (I think she learned it from the "Backyardigans"), while serving up pretend hot chocolate in her play mugs. You can believe her excitement when I said we could make our own "warm chocolate" to share in some fancy (and breakable) cups and saucers my grandmother passed on to me (she used to serve hot "cocoa," as she called it in them to us grandchildren when we were little; thanks Granny!).

We have a very simple recipe that is actually quite similar to the one I saw on Blythe Raw Live yesterday (it's a web show I watch every Friday afternoon. Love it!). Blythe made a luxurious sipping chocolate powder to give away as gifts. It had a cashew and cocoa powder base, like ours, but she made hers extra special with various other high quality ingredients.


If you watch our video, you'll see us make our quick and easy version, and then jazz it up with some raw white chocolate mint stirrers I made this morning.
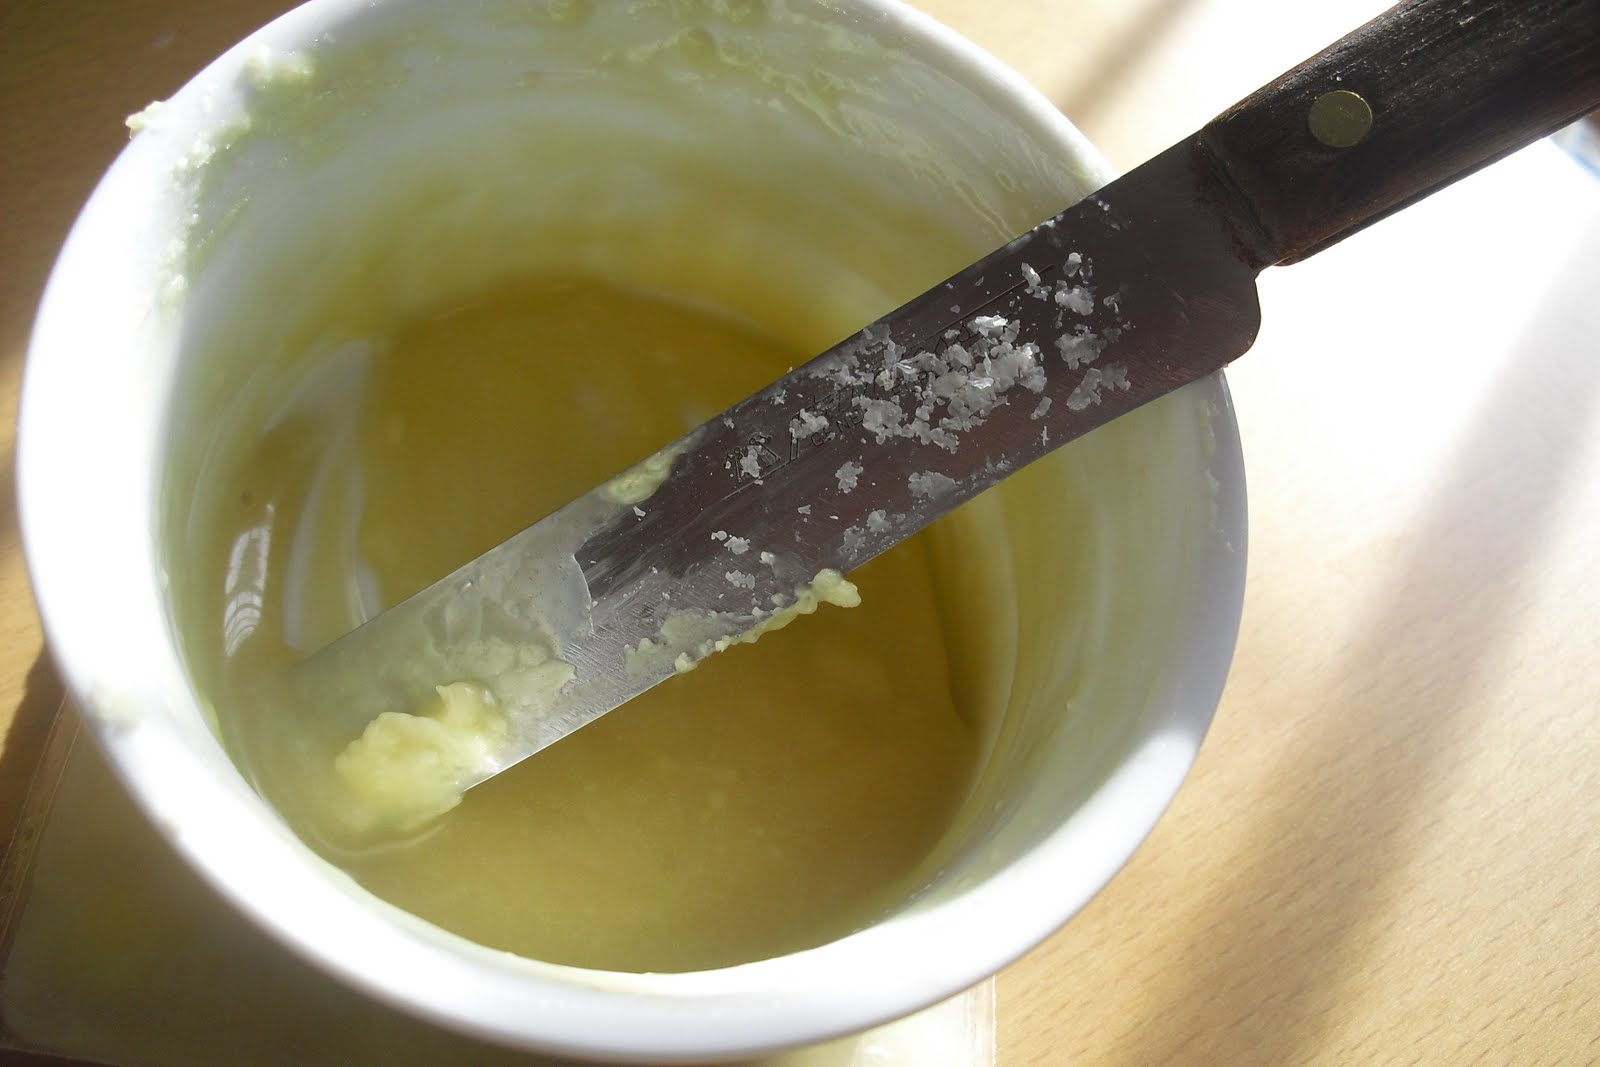
All I did was gently melt some grated raw cocoa butter (about 1/4 cup) in a warm ramekin (stirring it, as it melted). Once it was melted enough, I stirred in a drizzle of agave (although you could use another liquid sweetener) and a drop of mint extract).

Then, I set the ramekin on an ice pack to speed up the cooling process, so it would thicken up a bit. Once it resembled a frosting-like consistency, I spread a thin layer on a piece of parchment in a rectangular shape. Before it completely hardened, I used a knife to mark/separate the white chocolate into strips (or for today's purpose, "stirrers"), and placed the stirrers into the freezer until ready to use.

When placed in our "warm chocolate" beverages, our rustic-looking stirrers slowly melted, leaving behind a richness and minty flavor. Yum!

But, enough about that. We also just received our December Conscience Box in the mail. I was so excited about it that I videotaped us opening it, as soon as it arrived. I didn't even take the time to remove my coat (it is vegan, BTW, and actually warm. Amazing!).

We ordered a Conscience Box after seeing Eco-Vegan Gal Whitney's video reaction to the one she got in November. She gave her thoughts and recommendations for improving future boxes, so I was wondering if any of her comments would be reflected in the December mailing.

I lucked out, finding a special discounted price on mine (and only $3.95 shipping) via Loving Eco (a site I love for amazing deals on eco-friendly products with part of the proceeds going to good causes. You never know what will be on the site, as product offerings change from week to week). I tweeted about it at the time, and it sold out.


Here's our video showing what was in our box this month. I was tempted to type everything out, but I don't want to spoil the surprise for anyone who hasn't received theirs yet (just don't look at the photo below, which is missing the air freshener that Hayden kept running off with; you can see her foot in the background of the pic of just the air freshener).

My opinion on the box was that it's a lot of fun to discover new products and samples this way, especially when you don't make it out to events where they are giving these things away. I also like the surprise part of it, although I probably wouldn't pay the full price for this mystery box every month.

Instead, I signed up for Eco-Emi, which tends to contain products that are more up my alley and for only $15 a month (shipping is free). My first Eco-Emi box should arrive next month. I can't wait to tell you all about it when it does.

Did anyone else order a Conscience Box? How about Eco-Emi? Let me know your thoughts.

*****

Oh, in case you didn't notice it in the background of the Conscience Box video, Hayden wanted to show you her Charlie Brown tree ... and the chocolate that's still on her face :-)

Friday, December 9, 2011

We've got ourselves a winner


Happy Friday everyone! Hope your weekend is off to a good start, and for one of you, we may be able to help.

Hayden (who just woke up and was acting stubborn; nothing was going to get between her and her breakfast) and I drew the winner of our Better Late Than Never Anniversary *GIVEAWAY*. Check out the video below (with our Charlie Brown tree in the background) to find out who won (for those of you who cannot access the video, I'll let you know who it is in the comment section, and if it's you, I'll contact you via e-mail). Congratulations and thanks to everyone for participating.


And, since I haven't posted any of my food on the site in a while, I thought I'd show you a quick dish I made during the Thanksgiving break. This time of year is so hectic, that I try to keep my meals as simple as possible (which explains why I haven't been posting recipes lately), like with these raw green beans, dressed with a little squeeze of lemon juice (this also tastes amazing with balsamic vinegar), a drizzle of olive oil, a sprinkling of pecans and goji berries, and some herb macadamia nutmilk cheese crumbles that I purchased from PunkRawkLabs.net (Alissa recently posted her Rustic Holiday Flatbread recipe video, which is fun to serve alongside this). So easy, yet so delicious.

Enjoy your weekend!

In case you missed it, check out these past posts:

Wednesday, December 7, 2011

Santa is in need of some elves


I hate to ask for things from my readers, but I think Santa is going to need help from some elves.

You see, Hayden and I were asked to participate in a contest. All we needed to do was make a video with the response,"My OpenSky is ..." and fill in the blank. The video had to highlight a product from their gift guide (here's our gift guide from there, if you missed it) and encourage viewers to use a personalized link to sign up as a member of the OpenSky community (and be 2 min. or less, which is quite a challenge for us).

So, why do I need some "elves" to sign up?

Well, we were hoping Santa might bring us an iPad2 after Hayden stepped on our old school model. You can't quite see it in the video, but ours has a crack that goes all the way across the bottom of the screen.

The top three bloggers/vloggers, who get the most viewers of their video to sign up via their invitation link (you'll find it under my video on YouTube or in the links throughout today's post) by Dec. 31, 2011, will win a prize, one of them being an iPad2. Dreaming that Santa will work his magic (see the kids snuggled up in bed, trying not to peek. Okay, so maybe they weren't really asleep for the pic below. I just thought it was cute), we've got our fingers crossed that some "elves" will be of assistance.

But, what's in it for you?

Well, first of all, you'll be able to do some holiday shopping online or perhaps pick up something for yourself (I won't tell). It's fun to spread some holiday cheer.

Speaking of a cheer, if we win something, maybe Hayden and I will do a silly cheer for you, posting it on YouTube, thus making the ridiculousness last forever. I got the idea from another mommy blogger, who won a past OpenSky contest. She said if she won, she'd videotape herself tap dancing in a Santa hat, and she kept her promise in this YouTube clip.


Now, it doesn't have to be a cheer. Let me know what you'd like to see. It could be something embarrassing (but clean, as this is a family site; for example: after seeing someone lick their elbow on t.v., I discovered that I can do it, too. TMI!), cute (Hayden can sing her ABCs and loves to play our keyboard; maybe Jacob could teach her a song) or just a new recipe post.

Comment below and I'll pick a few for everyone to vote on, possibly using a poll tool on my sidebar. If you help us and we win, we'll do your request
(I understand if signing up just isn't your thing. Don't hold this post against us; we'll still do some less commercial posts in the future, so feel free to contribute your requests).

Thank you!

BTW, don't forget about our "Better Late Than Never *GIVEAWAY*" going on right now. We'll be announcing a winner on Friday, Dec. 9, 2011. Click here to find out how to enter.

Monday, December 5, 2011

Better late than never anniversary *GIVEAWAY*


Things have been so crazy around here lately, that I nearly forgot about my blog's 4-year anniversary last month. In recognition of it (as well as Jacob's birthday; he's turning 9 years old on the 13th of this month), I decided to have another giveaway on my site.

I really haven't been in the habit of hosting giveaways, but since I did one for Robyn's "Travelling in the Raw" e-book last week, it seemed only natural to do a more personal one in honor of these two occasions (my blog's anniversary and my son's 9th birthday). We like to celebrate around here with raw vegan cupcakes (no surprise), so the very first item that came to mind was my raw cupcake e-book.

Now that it's been available for a while (I posted it for sale on March 24, 2010), many of my loyal readers already have an electronic copy (although some of you have printed yours out). Therefore, I decided to offer up something more special: 1 of the 20 printed copies my hubby had made up for me to give to friends and family (there are only 20 he had printed, so these are not up for sale; it is still just an e-book as far as purchasing goes).


Those who have a copy include friends/family, such as my mom (my biggest fan), our local library (it actually gets checked out sometimes), and Brendan Brazier (he signed my copy of his original "Thrive" book, and I gave him one of my raw cupcake books). And, now one lucky winner can have a copy (it's not the most professional copy, as you'll notice in our giveaway announcement video, but it is one you can physically hold in your hands), too, along with some extra things I tossed in for fun.

These items include some of the products and samples we've reviewed lately on the site. You may recall the That's It. fruit bars Hayden couldn't get enough of in our video review. That's It. liked the video so much that they posted it on their website (Hayden's a star!) and sent us another box (thanks!). Before Hayden ate them all, I put one of each flavor (apple-pear, apple-cherry and apple-apricot) to the side to reserve for this giveaway.

I also added in some 100% Pure lotion sample packs that came with one of my orders. I used the ones sent to me, along with the products I reviewed in this past post, but I got more to share with my follow-up order (this company definitely has itself a customer).

Next up are more bars. The Good Greens Plus Bars were so good, that I only managed to sneak two bars to the side for the giveaway. The flavors include Chocolate Raspberry and Wild Berry.

Heads up to the vegans entering this giveaway, the next group of four bars contain honey, but those who are "bee-gan" (a term I sometimes use for my minimal use of bee products, but only when the product is very natural and of good quality; I go back and forth on this issue, so please don't judge me). They are the Raw Crunch bars I reviewed in this past post. OpenSky had sent me a box of the goji berry flavor to review, and after seeing our video, Raw Crunch decided to send us a mixed box of flavors, too (thanks!). I included one of each flavor (goji, cranberry, blueberry and chocolate) in the giveaway.

Lastly, I put everything in an ECOBAGS reusable produce bag that I like to take to farmers markets with me to bag the fresh produce. I had ordered a number of them, ages ago (they come in packs of 5). Somehow this one had never been used and still has the tag on it.


So now that you can see all that's included in this *GIVEAWAY*, here's how to enter:
  • Comment on this post answering the question, "What raw vegan cupcake recipe did I post in celebration of my blog's 1-year anniversary?"
  • For an additional entry, tweet about this giveaway, including @Rawdorable in your tweet. Then, leave a comment saying you did so.
*My hubby advised me to only have this giveaway open to residents of the United States and Canada. So sorry to all my other readers, as I love you, too.

I'll be announcing the winner on Friday, December 9, 2011. Good luck to all that enter, and thanks for stopping by my blog :-)

*****

On another note ...
I just wanted to let you all know that I'll be contributing to a fashion and beauty blog twice a month.

I've always loved fashion and beauty, sometimes giving you a glimpse of what I like in past posts (if you missed the past two, click on this link to see my recent upcycling post, and here to view how to make a two-toned infinity scarf out of t-shirts). If you want to check out more of my DIYs and/or cruelty-free beauty product reviews (my first post will probably be about my thoughts on Christie Brinkley's new skincare products) in the future, visit LogicalHarmony.net.

Saturday, December 3, 2011

DIY strikes again


For those who know me well, it is no surprise that I like to take my old clothes and accessories, and make them new again. I sometimes rescue items from the back of my closet (the ones that otherwise would never again see the light of day), perform some creative modifications and turn them into fun, fashionable pieces.

If you read my last post, you already now about a few examples I've shared on my site. Since I received a positive response in the comment section, I thought I'd show you another one. It's so simple, and I'm sure most of you probably have what you need to make it.

Although my mom taught me to knit, I also like to make scarves out of fabric, like today's project, a two-tone, cotton infinity scarf (a scarf that connects at the ends to create a loop; you may have seen it referred to as a circle or loop scarf). Here's how I made this one out of two old cotton shirts.

First, rummage through your closet or drawers to find two cotton t-shirts that you haven't worn in a while. I had gotten these two while pregnant and later breastfeeding, so now that I'm no longer in either of those categories, I decided I didn't want to dress like I was (even if they weren't actually maternity shirts).

Matthew has a tendency to purchase me more than one of the same item in different colors, therefore, I lucked out to have two old shirts of the exact same size. This is important, as you want shirts to match up when you sew them together. It's also nice if they're in colors that compliment each other.

Hopefully, the shirts you select are not too fitted at the bottom and possibly flare a bit like these. The width of the bottom of the shirts will determine the size of the finished scarf and how you will be able to wear it.

The first thing you'll need to do is decide how wide you would like to make your scarf, tacking on an extra inch or so for seam allowance (you'll be sewing the two sides, which will result in a smaller finished product). I decided to go with 8 inches total.

Then, with a piece of chalk or a pencil (chalk works well on darker fabrics and will dust off when you're done, while a light pencil will show up on whites and pastels) mark that measurement up from the bottom of the both shirts in several places. Connect the dots to make a straight line.

Cut along the marked line on each shirt to remove the bottom band of fabric (don't worry; you can do it. You're bringing new life to these shirts). If you measured correctly and consistently, both bands of fabric should be the same size.

Put one band of fabric inside the other (this will be like a lining), with the top sides of the fabric facing in toward each other (the end seams will be facing away from each other).

Using a running stitch (the most basic of all sewing stitches; if you've ever sewn anything, even a pillow, you know what this is), to connect the two fabric bands together all the way around the bottom loop (sew slightly above the original bottom shirt seam, which will work as a guide).

Next, flip the bands, so that the seam sides are touching and the top of the fabric is facing outward. Now, you will need to attach the other side of the loops together. I used a ladder stitch/hidden stitch to do this (this lady has a pretty clear tutorial for this stitch), and enclosed about 1/2 inch of fabric from both loops inward toward each other, as I worked (sorry that I forgot to take a photo of this step; I guess I just got caught up in my project ... and watching Blythe Raw Live as I worked).

If this step sounds too complicated, use the running stitch again. Just make sure you are using a matching thread and that your stitches look pretty. However, if you provide a little extra seam allowance, the ends of the material should roll up over the stitches to hide them (cotton t-shirt material is magic like that; no need to finish off the edges, as you can see in my example pic to the right).

Your completed scarf should look something like this. Here, I'm wearing it just draped around my neck, as is.


You can also twist it to give it more interest. I think it resembles a chunky fall/winter necklace this way.


My favorite way to wear it is to loop it around my neck in as shown (drape it around your neck, twist it into a figure 8, and put the bottom of the "8" over your head/around your neck). It keeps my neck nice and warm, and is cute, too.


Let me know, if you make one, or have any other DIY fashion ideas. Have a good weekend :-)

Thursday, December 1, 2011

Zippy upcycling


I must apologize for all the commercialism on this site lately. I guess I got caught up in all the excitement of gift guides and shopping. I just wanted to share some of my favorite things.

But, not all of my favorite things require buying new to stay in fashion this season. For example, you may recall the upcycled jewelry I made for my mom and sisters for Christmas a couple years ago. I took pieces of old jewelry (like the picture charms my mom had from when we were kids, and an old belly chain, as if anyone wears those anymore), beads and ribbon I had lying around the house to create new pieces custom-made just for them.

Just the other day, I received an e-mail from Ecouterre with ideas for homemade and upcycled gifts. The accessories really caught my eye, such as an acorn necklace (made with a real acorn) and a braided beaded necklace. My favorite idea was for a cuff bracelet made from an old zipper, designed by Tara St. James.

I couldn't wait to make the zipper bracelet, so I immediately pulled out this old jacket from the back of my closet (it must have been sentimental to me, because it looks rather dated; no wonder I haven't worn it in years), grabbed a pair of scissors and got to work removing the zipper.

Yes, I should have used my trusty seam ripper or perhaps a pair of sewing shears, but I ended up cutting the attaching threads with some hair-cutting scissors, as those were the most convenient at the time. Then, I pretty much ripped the zipper out.

What a rush! I felt like one of the designers on "Project Accessory," one of my favorite shows at the moment (I'm hoping Nina Cortes wins, but if not, I also like Christina Caruso, whose designs had been worn by Sarah Jessica Parker in "Sex and the City"). Just like on "Project Runway," the contestants have to complete their challenges in a very short amount of time, but instead of designing clothes, they make jewelry, handbags, hats and shoes. Love it!

Their first challenge was to make three items using whatever they could get their hands on in a limited amount of time from a storage unit. The winner of the challenge made a simple, but amazing necklace, belt and ring out of matchsticks (you'll have to click to page 10 out of 12 to see her designs in the link) ... Goes to prove how chic upcycling can be.

Now, back to the bracelet, which I sewed together to fit me perfectly. Here's my finished accessory, thanks to following Tara's instructions. What do you think? Let me know if you make one, too, and if you have any other fun DIY projects to share :-)


This post also made me think of the edible necklace I blogged about a while back. I made it out of grapes. Anyone else have any ideas for making raw vegan jewelry?

Wednesday, November 30, 2011

Who guessed Sinatra?

Okay, it seems that some of you need to go back to school with my son. His teacher is always stressing the importance of following directions ... although he probably would have done the same thing. Shhh ... I probably would have, too, which is why I still entered everyone who commented and tweeted about Robyn "Girl on Raw" Law's "Travelling in the Raw" e-book (thanks to all of you, btw; I'm sure Robyn thanks you, too).

What do I mean about following directions?

If you read the turquoise-colored text at the bottom of my last post, you would have known to answer the question,"Who's singing "Come Fly With Me" in the YouTube clip I linked to at the top of the post?" For those of you who remembered to type "Sinatra" or "Frank Sinatra" in your comment, I am thoroughly impressed with both your answer and attention to detail.

For those of you who didn't, don't fret, as I decided to give you a second chance and include your names in the drawing, too. It reminded me of when Robyn bought my e-book when it first came out and was expecting a printed copy (just a slight confusion that can happen when you miss the "e"). She totally understood, so in her honor, everyone is entered anyway.

Just keep this in mind the next time I do a giveaway. I may use trivia again, and I might offer up a printed version of my raw cupcake e-book. There are only about 20 in existence that my hubby printed special for me (although I know some of you who purchased it printed out your own personal copies). So far, they've only gone out to some friends and family, our local library (yes, people have actually checked it out from our library) and I gave one to Brendan Brazier when I met him. I'll tell you more about it in a future post.


And now for the winner that Hayden pulled out of the bucket right before I posted this. I got it on video, but in case you can't watch it, the winner is ... Tashina of Logical Harmony (she actually did answer the question correctly, too). Congratulations! I've forwarded your e-mail to Robyn, who should be e-mailing you your copy soon. Thanks to everyone for playing :-)